Tuesday, August 12, 2014

Vintage School Desk


Vintage or old school

(click on photo to enlarge)


Working on this classic brought back 
many memories of my elementary school days 


It came complete with a gooey 
spill on the inside and a few pieces 
of petrified bubble gum 


After a thorough cleaning, a quick sanding
and a coat of Sedona-red stain 
it was looking allot better


After three coats of finish
it's ready for use, great for 
 home schooled


Friday, August 8, 2014

Child's Musical Rocker

No battery's Required.
This mid century rocker would not
meet today's standards for child
safety yet it is still highly collectible. 

(Click on photo to enlarge)


With a layer of rust
it was no wounder why
the music stopped.


After soaking the mechanism 
for several days I disassembled it 
and removed as much of the rust as
possible.   


Re-assembled and ready 


One of the challenges
was to re-arc one of the 
rockers that had straightened
over the last 70 or so years.   


Using my upholstery steamer I set
up a simple board steamer.


After about 30 minuets in the steamer
I clamped the rocker rail to an
arced jig then left to cool for 
24 hours.


While waiting for the rocker rails to cure
I worked on the rest of the frame.


Re-assembling step by step. 


Ready for stain and finish


Completed and ready to play  


Music to my ears


Wednesday, July 30, 2014

Antique Oak Chairs (1890's)

For centuries the claw or paws foot  
style has been featured on mostly high-end
furniture. 
As we reached the end of the 1800's with 
the beginning of the industrial revolution 
designs start to take on a more square and simpler design. 

                            (Click on photos to enlarge)


The damage on this pair was severe it would take most all my clamps and much of my patients to complete.                      More than a  complete tear down was needed.  


After removing the finish I set to the task of turning new oak dowels to replace the pine used from the previous repair.  


The process of cleaning, gluing, clamping and reshaping took a lot of time. 


Clamp 


Clamp 


Clamp 


Clamp 


And Clamp.
I think I went clamp happy. 


Assembled and waiting finish


"Finished"
I used a Golden oak stain 
with a Satin clear coat. 
Each chair took about 20 hours
to complete, they should last 
another life time. 


Sunday, July 27, 2014

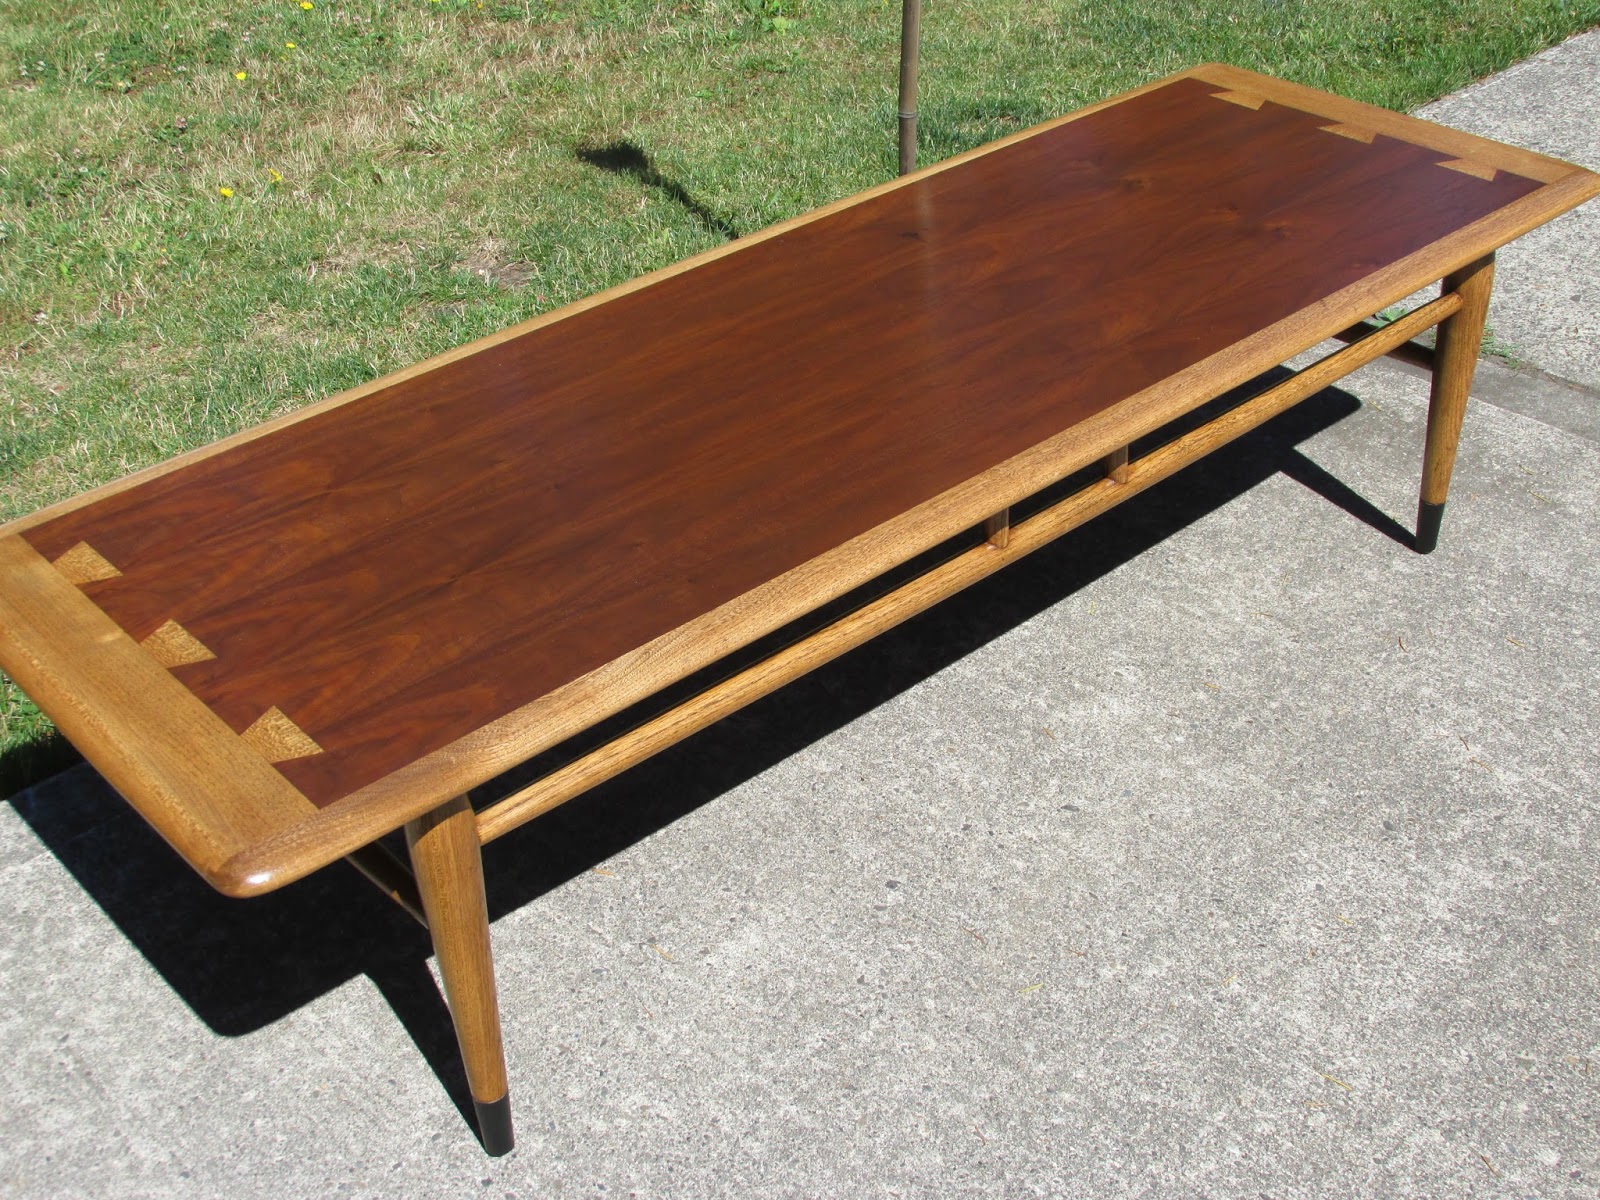
Lane Danish Modern Coffee Table


(Click on Photo's to Enlarge)


What was a hit in the sixties is now a well seasoned and heavily
 scarred table.


With each project comes unique challenges.              What I was faced with is how to remove gouges without extensive sanding that may result in an uneven surface.


I started be removing what was left of the finish.  


Then used a steaming 
technique to raise the gouges. Simply place a wet towel over the scratched area and apply heat and steam the effected area should raise.   It took me several attempts
to accomplish. 


After several step of the sanding process I was more than pleased. A coat of wood stain applied and it seams that most damage was repaired. 


 I bought this from a sweet old lady who 
was noticeably heart broken with the condition it was in. 
I hope she can see it now.


Wednesday, July 23, 2014

Little Drop-leaf table


After 15 years in the corner of the shop this little table acquired quite a few stains. paint droplets and dust.


After cleaning with dish soap and water it became clear the stains were going to be stubborn. 


When I saw this one I wasn't sure it could be saved, it looked like an oil stain.


Mom recommended using her special cleaner. 
"You know she puts that stuff on everything" 


It worked great. 
I can't believe how well it worked


Thursday, July 3, 2014

Vintage G-Plan Chair

A sample of the post war modern design.


The G-plan style has been copied
by many manufactures of the time.


This little gem has seen it share of
usage. With damaged pieces chips and a 
wobbly frame it needed the works.  


Step one: disassemble and repair what was broken. 


Step 2: Sand each part and reassemble. 


Step 3: Apply stain, rub on finish, upholster cushion
and ready for use.


Seth Thomas Mantel Clock


This mantel clock built by the Seth Thomas Co. (1920's)
was deeply loved by it's care taker for many years.
One fateful day while they're family cat
was skulking across the fireplace mantel the clock was
dislodged from it's perch sent crashing to the floor.


What was found were the broken remains 
of a treasured piece of family history. 


 Glass shattered, bezel bent, resonating base board 
splintered and the clock works itself damaged. 


As always having all the pieces broken or not
makes the difference in how the repair will go. 


Unfortunately the pendulum 
was not only broken but missing.   


 Using a .004 fealer-gauge and 
a steel rod I made one.


What also was bent out of recognition
was the winding's locking spring.
So from a coil spring  "left", I fashioned the 
part "center" then installed.
The three pieces on the right where the original part.


After much tinkering it works.
If you ever decide to try a home
repair my suggestion is not to